
3.1. Configuring Telegram
You can use the Telegram messenger for receiving project notifications. Boro sends notifications via a Telegram bot.
To configure Telegram sending, the following steps should be performed:
Creating a Bot in Telegram;
Adding a Telegram Bot to the settings of the Boro Solution Server;
Adjusting the Telegram notification profile.
3.1.1. Creating a Bot
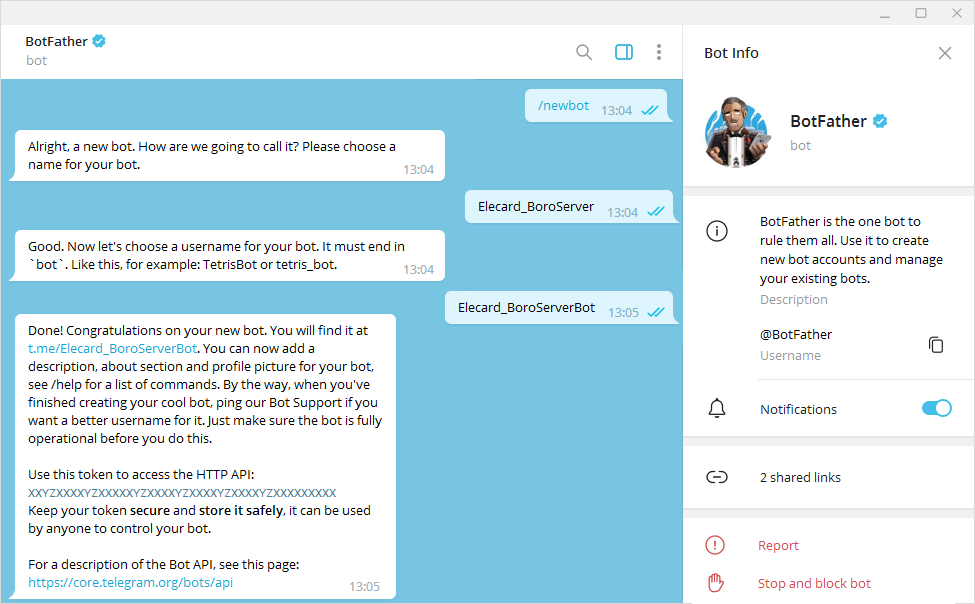
To create a Bot, go to Telegram and enter @BotFather in the search tab.
The official bot should have a blue checkmark beside its name.
Next, follow the steps below:
Click Start to activate
@BotFatherbot. Choose from the list or type the/newbotcommand and send it;Choose a name for your bot, e.g., Boro Notifications;
Choose a username for your bot, that should end with the word
bot;Save the token received in the
@Botfatherreply.
3.1.2. Adding a Telegram Bot to Boro Solution
Important
It is required to specify a Host Name on the Email tab. System cannot apply Telegram settings without this.
Open the Administration page and go to the Telegram tab. Next, check the Enable box and fill in the following required fields.
Token – authorization key (token) sent in the message from the @BotFather bot after creation of your own bot. Copy the received token in that field.
Bot Name – a bot username set at the bot creation. Specify the bot username without the at sign ‘@’, e.g.,
Elecard BoroServerBot.
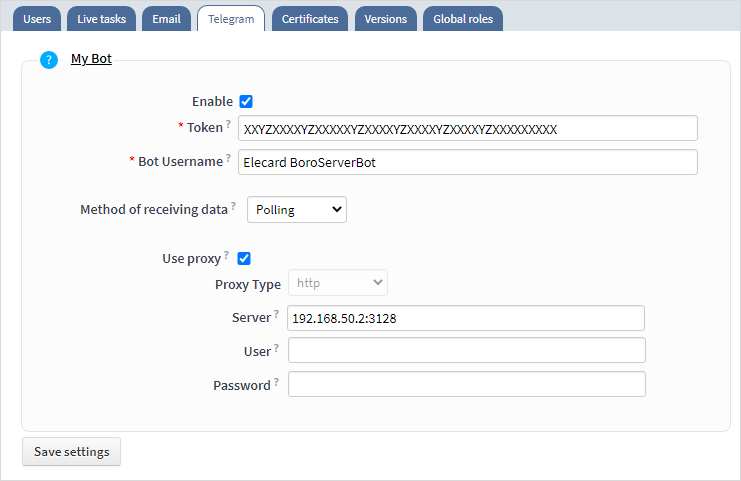
Additionally, you can specify the following parameters:
- Method of receiving data – selecting the method of getting updates:
Polling - Boro Server periodically requests data updates from the Telegram server.
Webhook - Telegram server will send data updates to Boro Server. This method reduces network load and provides timely information. Sending updates via Webhook is possible only if there is a public IP address available from the internet, and an HTTPS protocol is used.
- Use Proxy – allow a proxy server using. Enable this option and set required parameters if direct access to the internet is not available.
Server – the IP address of a proxy server specified as IP_address:port;
User – the username for the authorization on the proxy server;
Password – the password for the authorization on the proxy server.
To save settings and add a bot, click the Save Settings button. Changes to settings take effect after 20 seconds, as soon services will be automatically restarted.
3.1.3. Adjusting a Notification Profile
As soon as a bot has been added, go to the project settings and open the Notifications ➝ Telegram tab. Create a notification profile, set required triggers and add the profile for analysis tasks. You can find more information about Telegram notification profile configuration in the User Guide.